")
")
")
")
")

")
")

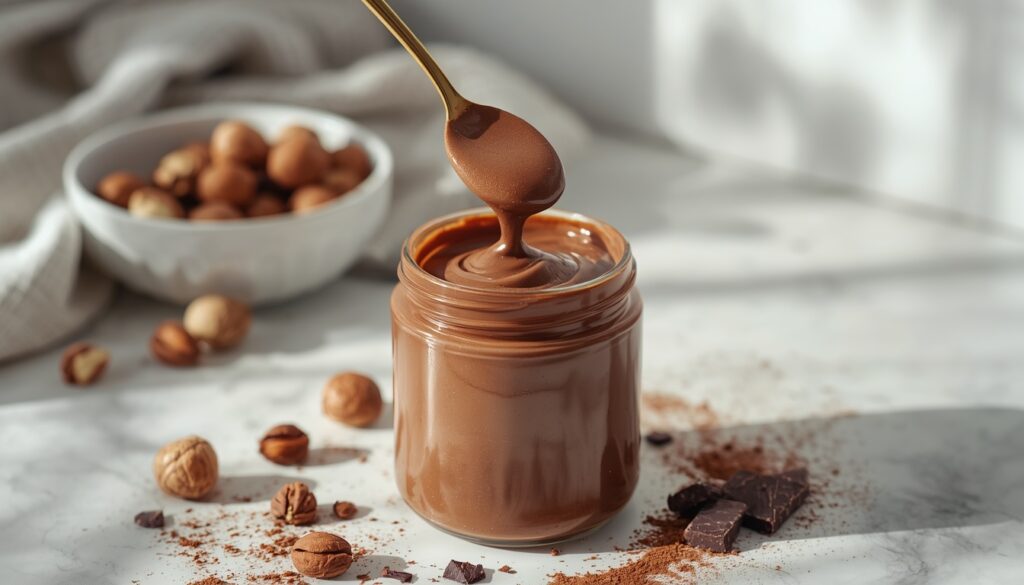
I have always been a huge Nutella lover. Genuinely the kind of person who could eat it straight from the jar without thinking twice.
But when I started paying more attention to what I eat and how I feel afterwards, I realized I wanted something that gave me that same creamy chocolatey feeling — just without all the unnecessary ingredients that came with it.
So I started experimenting. And after a few tries, I finally landed on a version that comes so close to the original it honestly surprised me. Smooth, rich, perfectly sweet, and it still feels like a real treat every single time.
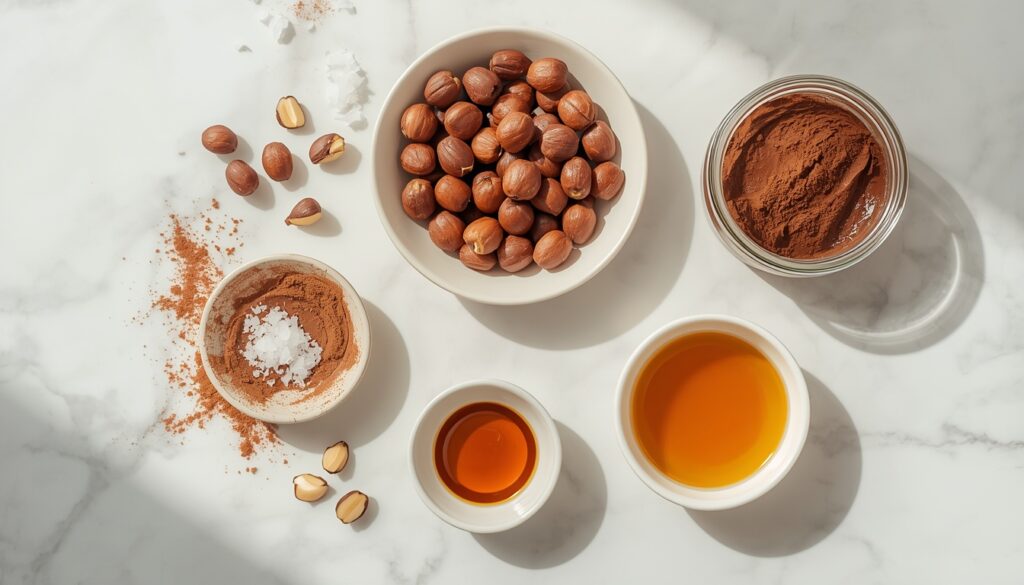
What You Need
- 2 cups hazelnuts
- 2 tbsp cocoa powder
- 2 tbsp maple syrup
- 2 tbsp coconut oil
- 1 tsp vanilla extract
- ½ tsp sea salt
How To Make It
Step 1 — Roast your hazelnuts
If your hazelnuts are not already roasted, roast them in the oven for a few minutes until they turn slightly golden and smell nutty and warm. This step makes a bigger difference than most people expect — roasting draws out the natural oils and creates that deep, rich, intense hazelnut flavor that makes this taste like real Nutella instead of something flat and bland. Do not skip it.
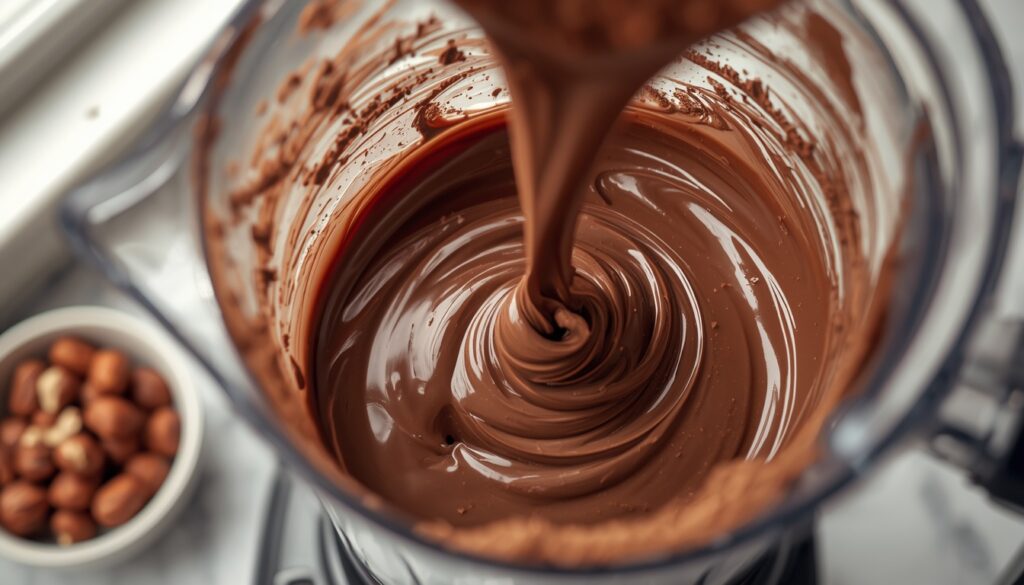
Step 2 — Blend into a butter
Let the hazelnuts cool slightly then add them to a food processor or strong blender. Blend patiently. At first they will look like rough crumbs and it may seem like nothing is happening — keep going. After a few minutes the nuts start releasing their natural oils and the texture slowly transforms into a smooth, creamy nut butter. This silky base is everything.
Step 3 — Add everything else
Once your hazelnuts are creamy add the cocoa powder, maple syrup, coconut oil, vanilla extract, and sea salt. Every ingredient has a job here — cocoa for deep chocolate flavor, maple syrup for natural sweetness, coconut oil for that smooth spreadable texture, vanilla for warmth, and sea salt to balance everything perfectly.
Step 4 — Blend until smooth and glossy
Blend everything together until the mixture is completely smooth and glossy. This is where it starts looking like a real chocolate spread. If it still looks a little thick keep blending — the longer you go the creamier it gets. You are looking for that soft, rich, indulgent texture that makes you want to eat it straight from the blender.
Step 5 — Taste and adjust
This is the best part. Taste it and make it yours. Want it sweeter? Add a little more maple syrup. Want it more chocolatey? Add another pinch of cocoa. Want that warm dessert feeling? A drop more vanilla does it. This is your version — make it perfect for you.
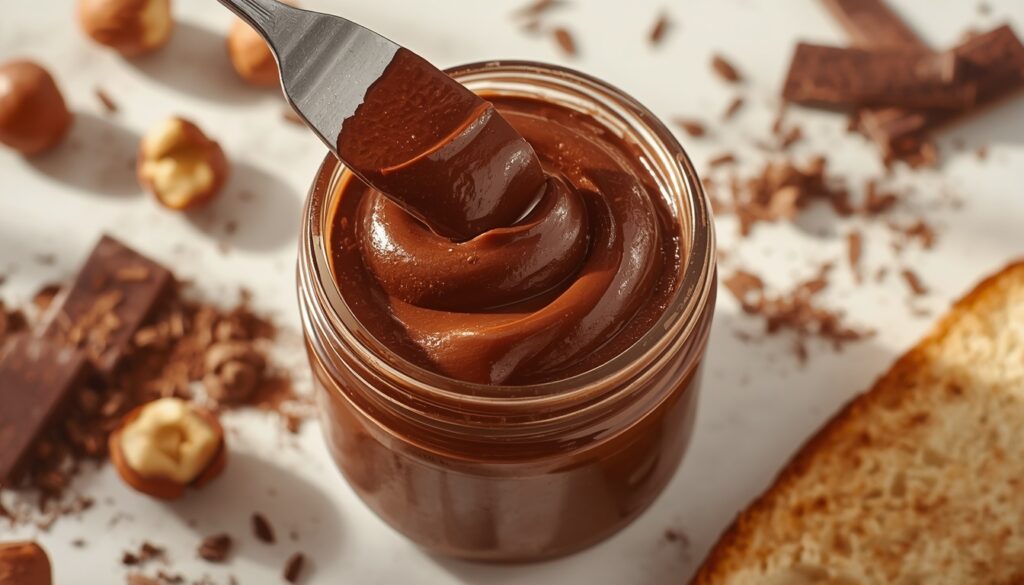
Step 6 — Transfer to a jar
Pour your finished spread into a clean glass jar. It should already look rich, creamy, and glossy at this point. Use it immediately if you love it soft and fresh, or let it sit for a while and the texture settles into something even thicker and more spreadable. Perfect on toast, fruit, pancakes, or honestly just a spoon. 🤍
Step 7 — Store in the fridge
Keep it in the fridge since this is homemade without preservatives. It thickens up beautifully in the fridge and becomes even more spreadable. Just take it out a few minutes before eating if you prefer a softer consistency.
Why This Version Just Feels Better
What I love most about this is not just the taste — it is the feeling after.
With regular Nutella there is always that moment where you think “I probably had too much of that.” The sugar, the palm oil, the ingredients you cannot pronounce — it adds up fast.
With this version you know exactly what is inside. Real hazelnuts, natural cocoa, a little maple syrup, and nothing else. It has that same creamy, nutty, chocolatey satisfaction but without your body having to deal with a long list of processed ingredients afterwards.
Same treat. Same joy. Just a version that actually feels good to eat every single day. 🍫🤍